How to Solve the Seesaw Puzzle in Silent Hill 2 Remake: A Complete Guide
Silent Hill 2 Remake brings back the iconic psychological horror experience, blending atmospheric tension with challenging puzzles. One puzzle that has left many players scratching their heads is the Seesaw Puzzle in the Blue Creek Apartments. Whether you’re playing on light, standard, or hard difficulty, this guide will walk you through how to unlock and solve the Seesaw Puzzle step-by-step, as well as the rewards that await.
Getting Started: Unlocking the Seesaw Puzzle
Before you can dive into the Seesaw Puzzle, you’ll need to make some progress in the Blue Creek Apartments and solve the Grandfather Clock puzzle. The door to Room 210, where the Seesaw Puzzle is located, will remain locked until you manipulate the clock’s hour hand to point at 9. Once the clock puzzle is complete, the door to Room 210 opens, revealing the puzzle inside. But don’t get too comfortable there are some grotesque enemies and eerie challenges along the way!
Step 1: Retrieve the Minute Hand from the Toilet
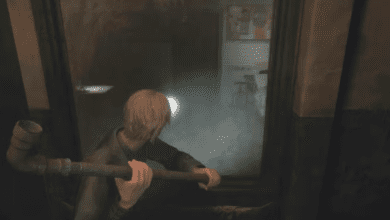
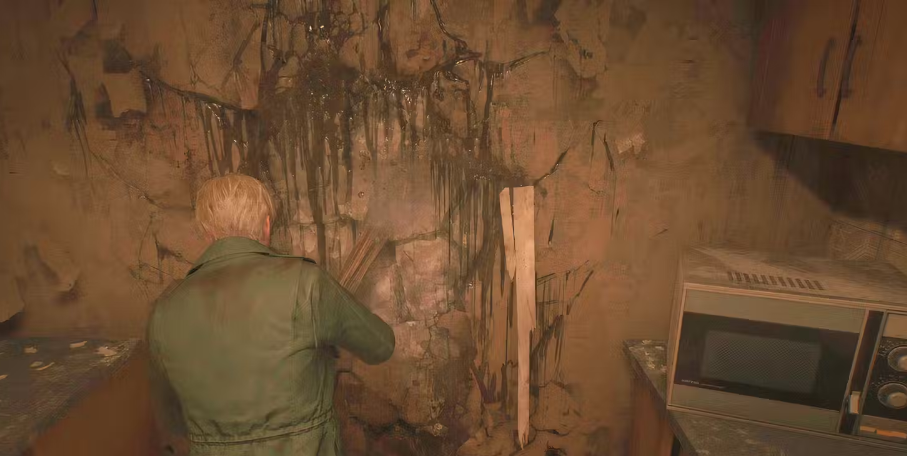
Once you enter Room 210, things get strange fast. In the room’s bathroom, you’ll need to break through a wall to discover a hidden toilet. In the toilet, you’ll find the Minute Hand a key piece to solving the Grandfather Clock puzzle and progressing through the apartment. However, retrieving the Minute Hand causes the room to transform into a decaying, decrepit state, setting the stage for the Seesaw Puzzle.
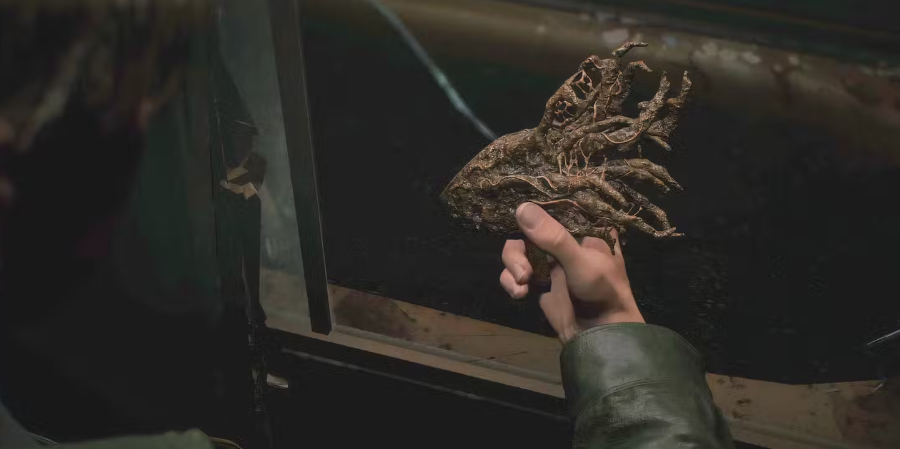
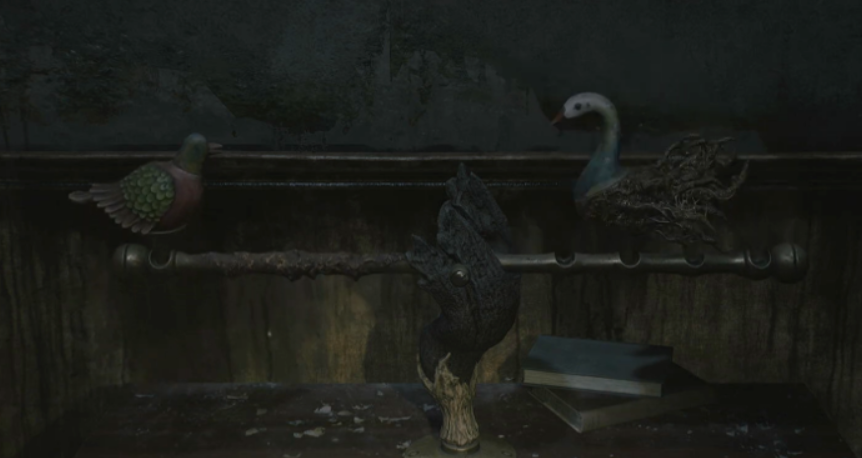
Step 2: Locate the Pigeon Figurine
With Room 210 now in its deteriorated form, leave the bathroom and head back into the main area. As you do, a cabinet will crash open, revealing the Pigeon Figurine inside. This small statue is one of the two key pieces for the Seesaw Puzzle. After grabbing the Pigeon Figurine, place it on the Seesaw near the television to begin setting up the puzzle.

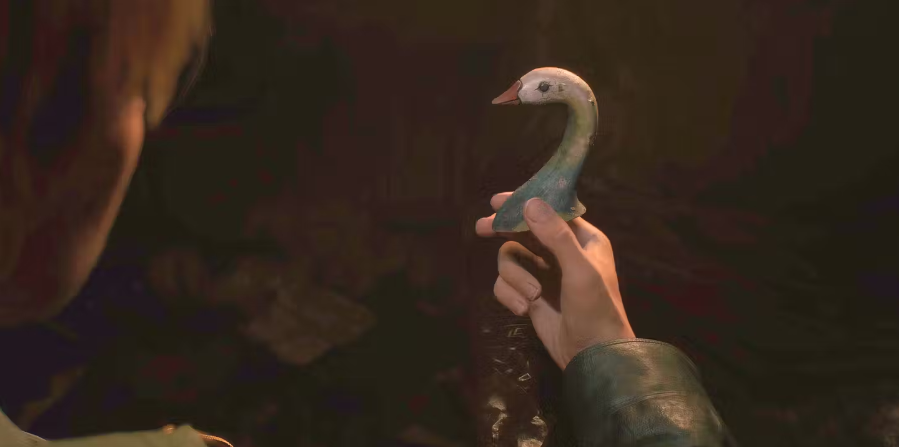
Step 3: Find the Wooden Swan Head
Next up, you’ll need the second figurine: the Wooden Swan Head. Step outside of Room 210 into the hallway and look to your right for a breakable wall. Destroy this wall to uncover an area filled with Spider Mannequins. After dealing with these terrifying enemies, search the room thoroughly. You’ll find the Wooden Swan Head hanging from a rope near a wall lamp. It’s crucial to collect this item, but the puzzle isn’t over yet you’ll still need one more piece.
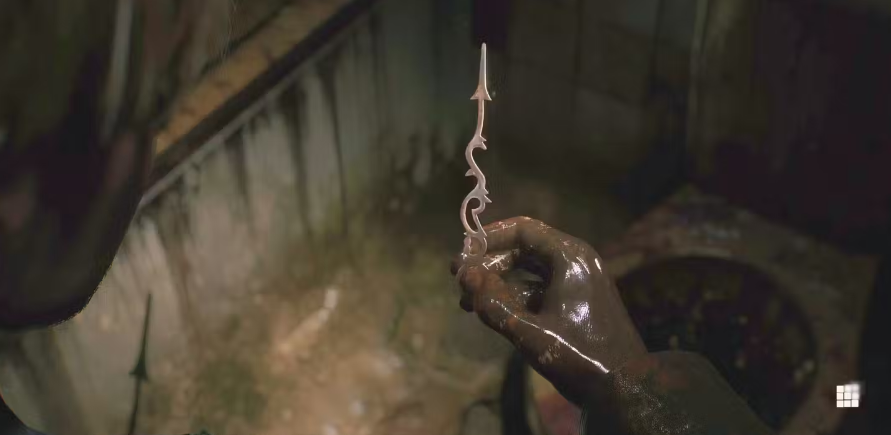
Step 4: Retrieve the Malformed Figurine Part
To complete the Swan Figurine, you’ll need to head to Room 209. Inside this room, make your way to the bathroom, where you’ll find the Malformed Figurine Part hanging in the shower. However, it’s behind glass, so break it to retrieve the final puzzle piece.
Step 5: Combine the Swan Head and Malformed Figurine Part
Now that you have both the Wooden Swan Head and the Malformed Figurine Part, it’s time to combine them. Open your inventory and fuse the two pieces together to create the complete Swan Figurine. This newly formed figurine will be essential to balancing the Seesaw and solving the puzzle.
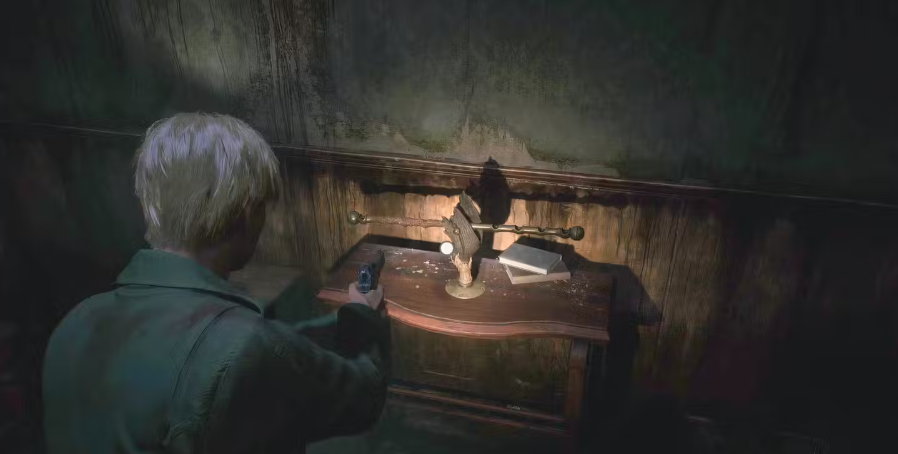
Step 6: Solve the Seesaw Puzzle
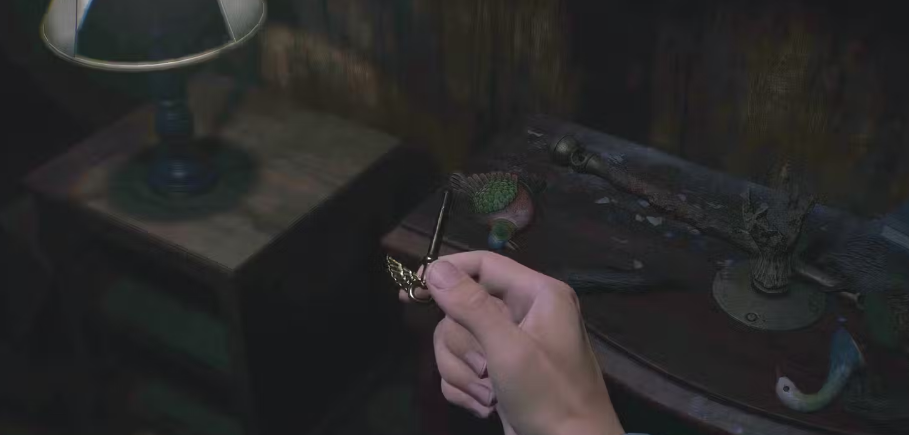
Return to Room 210, where the Seesaw awaits. You already placed the Pigeon Figurine earlier, so now you’ll need to place the completed Swan Figurine. Position the Swan on the second notch from the left, and watch as both figures balance the Seesaw. Suddenly, the Seesaw will break, revealing the coveted Winged Key.
The Winged Key is vital to unlocking the door beside the television in Room 210. After solving the Seesaw Puzzle, use the Winged Key to open the door, which leads to the next major section of the Blue Creek Apartments.
Step 7: Continuing the Journey
With the Winged Key in hand, open the door to the left of the TV in Room 210. Inside, you’ll find a large hole that allows you to drop down to Room 110 on the first floor. It’s not just another room this area is significant to the game’s story and leads to a chilling encounter with Pyramid Head. Afterward, you’ll make your way back to the Grandfather Clock, continuing your eerie adventure in the apartments.
Exploring the Puzzle’s Variations by Difficulty
The Seesaw Puzzle isn’t the same across all difficulties. Depending on whether you’re playing on light, standard, or hard difficulty, some aspects of the puzzle may differ slightly. Here’s a brief breakdown of what to expect on each level:
- Light Difficulty: The figurines are easier to find, and enemies guarding them are less challenging. The Seesaw Puzzle itself requires fewer steps, and the clues are more straightforward.
- Standard Difficulty: The puzzle takes more time, with a few additional steps and enemies that are harder to defeat. The placement of figurines may also be slightly trickier.
- Hard Difficulty: Expect a real challenge here. The clues are vague, enemies are tougher, and solving the Seesaw Puzzle will require precise attention to detail.
Regardless of the difficulty, patience is key, and following this guide will help you conquer the puzzle no matter how intense things get.
Why the Seesaw Puzzle is Important
While it might seem like just another puzzle in a long list of Silent Hill’s cryptic challenges, the Seesaw Puzzle serves a few crucial purposes. First, it demonstrates Silent Hill 2 Remake’s commitment to environmental storytelling, where every room has its own atmosphere and significance. Solving the Seesaw Puzzle also rewards the player with the Winged Key, which is essential for progressing the game’s story.
Moreover, this puzzle showcases the game’s mix of exploration, combat, and puzzle-solving mechanics. You don’t just have to find items you’ll need to battle monsters, destroy walls, and solve the puzzle’s physical mechanics. This blend of action and brainpower is a hallmark of what makes Silent Hill 2 Remake such a compelling horror game.
Other Puzzles in the Blue Creek Apartments
The Seesaw Puzzle isn’t the only puzzle players will face in the Blue Creek Apartments. Earlier in the game, players need to solve the Grandfather Clock puzzle, which directly ties into unlocking Room 210. As players progress further into the game, they’ll face more intricate challenges that require close observation of the environment and item management.
However, the Seesaw Puzzle is arguably one of the most memorable. Its eerie setup, strange figurines, and the tense atmosphere of Room 210 combine to make it a standout moment in the game.
The Silent Hill 2 Puzzle Experience
Puzzles are one of the core elements that make Silent Hill 2 Remake so iconic. They aren’t just obstacles to be overcome; they’re integral to the storytelling and atmosphere of the game. The Seesaw Puzzle, with its balance of challenge and reward, is no exception. With the help of this guide, you now have everything you need to master the Seesaw Puzzle, unlock the Winged Key, and continue your terrifying journey through the Blue Creek Apartments.
Keep your wits about you, pay attention to every detail, and remember: in Silent Hill, nothing is ever as simple as it seems.